


The Popup feature is available only in the WooCommerce MailChimp Newsletter Discount plugin’s pro version, also known as the extended version. This section contains a plethora of Popup Settings and features for use. Enabling the popup, adjusting the popup height and width, enabling exit intent, customizing the popup header text and body contents, and many other options are available.
- You can enable the popup on your website by checking the Enable Popup Feature? box. However, selecting this option does not guarantee that the popup will appear. The {WC_MAILCHIMP_NEWSLETTER_FORM} variable must be used in the Popup Text field. To see how to add it, go to the Popup Text Field.

- By checking this Enable Popup Feature on click buttons or links? box, When a user clicks on a button or a link, you can enable the popup. You must add the wcmnd-popup-trigger class to the button or link to enable this feature. You can also watch this video to learn how to do it.

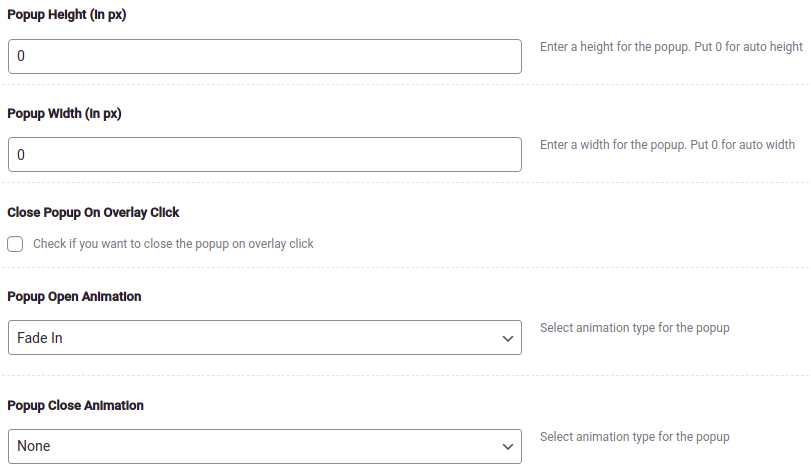
- These fields allow you to customize the Popup Height and Width, Animation, Effects, and other properties.
- Show Popup After Seconds in this field, you can give the time in seconds after which the popup will be showed to the website visitor.

- Enable Popup for Only for logged in users, Only for guest users, or For all users is available here.

- To Enable Popup On Mobile, check the box here.

- You can select whether the popup should appear on All Over Site or Only On Specific Pages and Posts.

- Here Select Pages to Show Popup. The options will be displayed in the drop down menu.

- Popup Header Text, enter the text that will appear on the Popup’s Heading.

- Enter the Popup Text here, which will appear in the Popup. If you are unsure what to write, enter the {WC_MAILCHIMP_NEWSLETTER_FORM} variable in the Popup Text field to display the form fields.

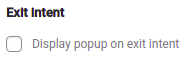
- Check this box to enable Exit Intent; the popup will only appear if the user is about to leave your site.
- Enter the number of days you don’t want the popup to appear to users, after they click the close button in the popup.

- More options for customizing the look and feel of the popup are available in the options below. Popup Background Color, Popup Background Image, Popup Background Image Size, Position, and other options are available.
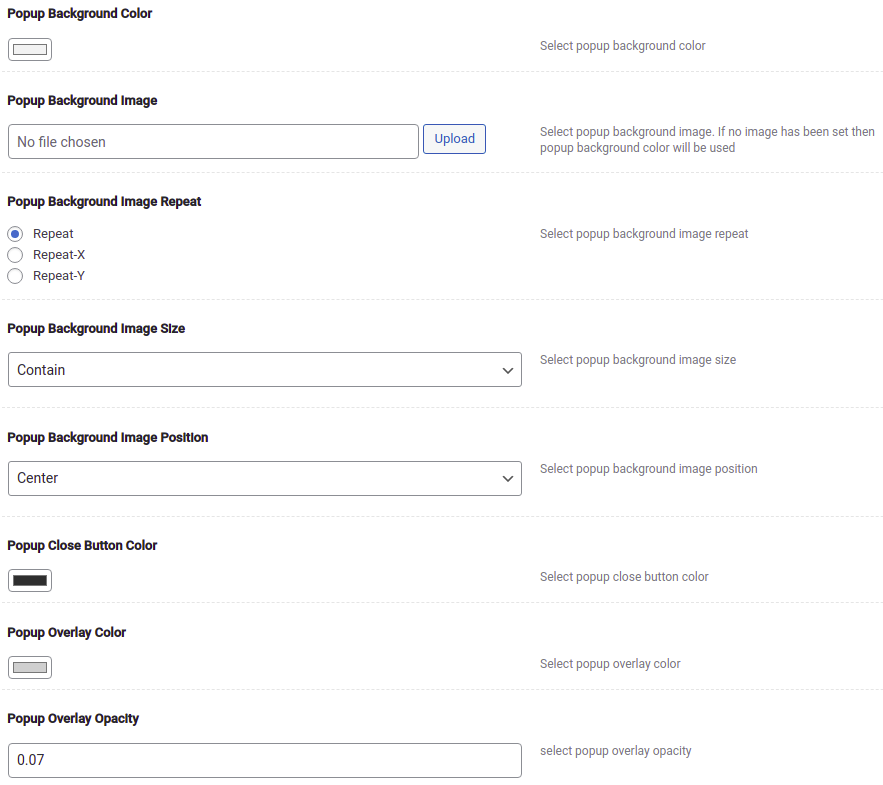
Please keep in mind that the Popup Overlay Opacity will not work for the following Popup Open Animations:
- fade in
- fade in down
- fade in down big
- fade in left
- fade in right
- fade in up
- bounce in
- roll in
- rotate in
- rotate in down left
- rotate in downright
- rotate in up left
- rotate in upright
This concludes the Popup Settings section.