


In order to translate the WooCommerce MailChimp Newsletter Discount Plugin’s setting pages and text contents to any other language, WPML plugin could be used. Apart from the following steps, there is another video on this for your reference.
 Settings Page ” width=”282″ height=”344″>
Broadly there are 2 steps to achieve the translation using WPML plugin.
- Putting the field id that needs to be translated in WPML XML configuration.
- Configuring translations in different languages for the above configured field ids.
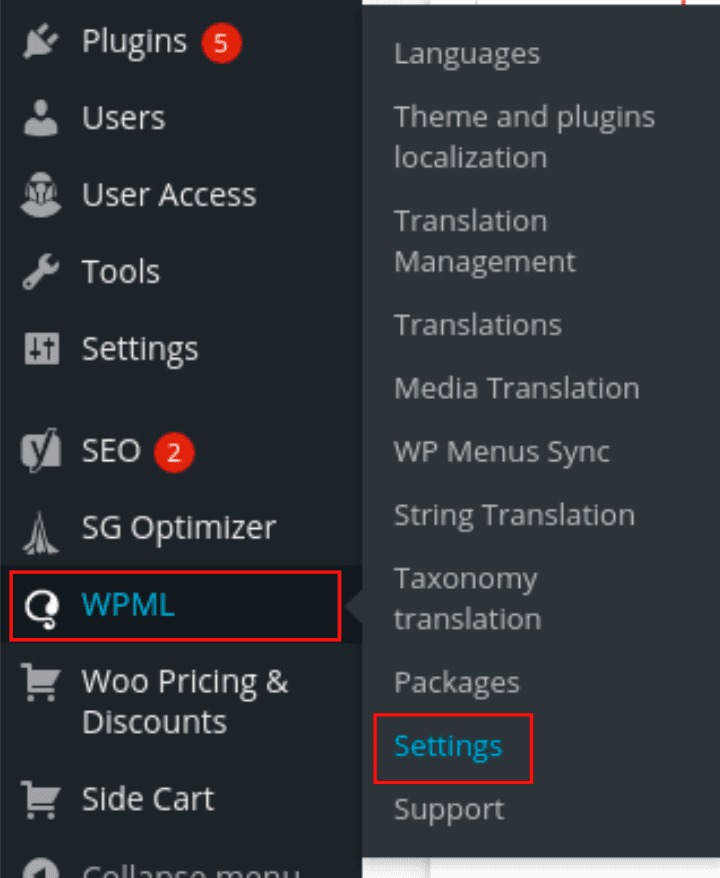
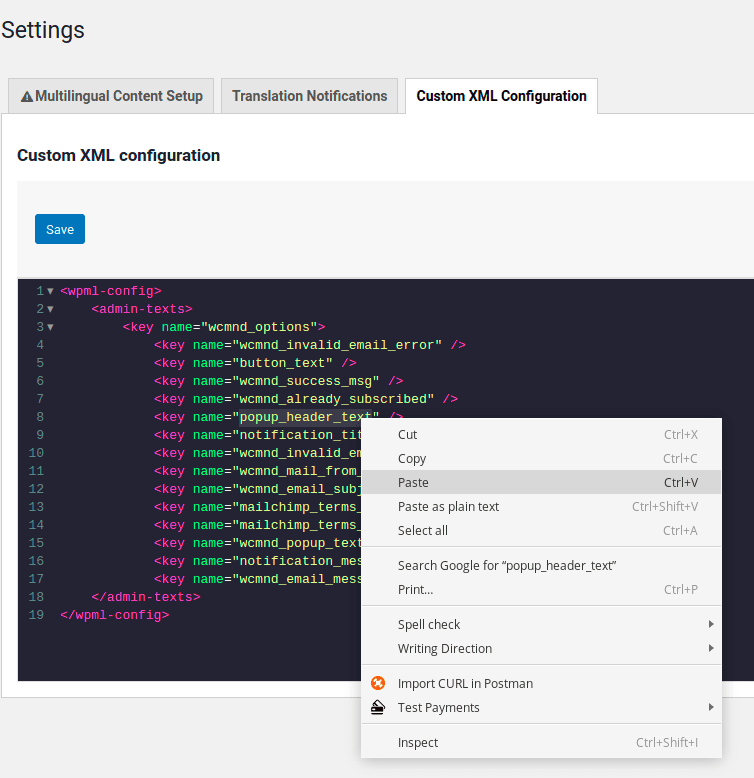
Once the WPML plugin is installed and activated, go to WPML > Settings > Custom XML Configuration to make the translation related configuration.
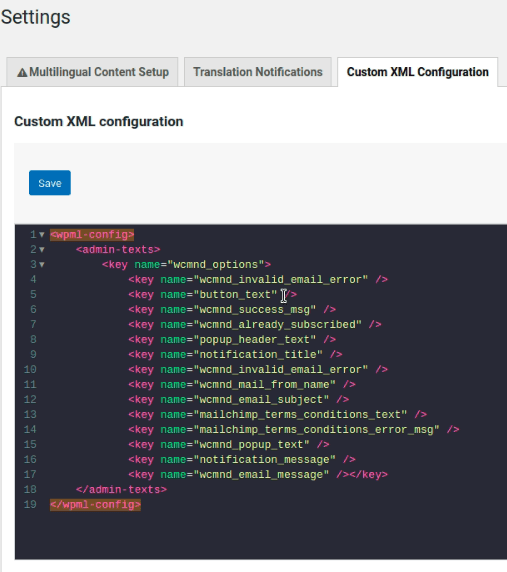
In the Custom XML Configuration, following code could be added.
<wpml-config>
    <admin-texts>
        <key name="wcmnd_options">
            <key name="wcmnd_invalid_email_error" />
            <key name="button_text" />
            <key name="wcmnd_success_msg" />
            <key name="wcmnd_already_subscribed" />
            <key name="popup_header_text" />
            <key name="notification_title" />
            <key name="wcmnd_invalid_email_error" />
            <key name="wcmnd_mail_from_name" />
            <key name="wcmnd_email_subject" />
            <key name="mailchimp_terms_conditions_text" />
            <key name="mailchimp_terms_conditions_error_msg" />
            <key name="wcmnd_popup_text" />
            <key name="notification_message" />
            <key name="wcmnd_email_message" /></key>
    </admin-texts>
</wpml-config>
Above code contains some default elements of the plugin that need to be translated. If more fields are to be translated, those field ids could be found using the Inspect option in the browser as explained below.
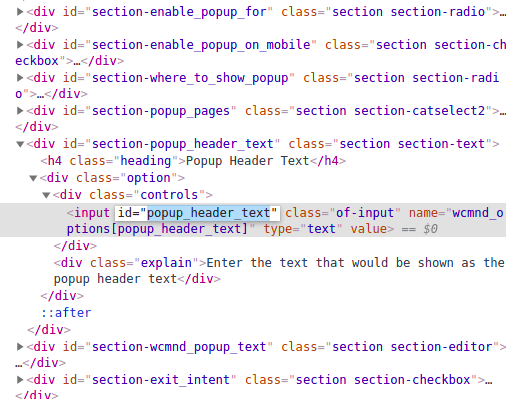
Then, on the WooCommerce MailChimp Newsletter plugin’s setting page and choose any field and right click on Inspect to get the id of the field that needs to be translated.
Copy the text value in the id property.
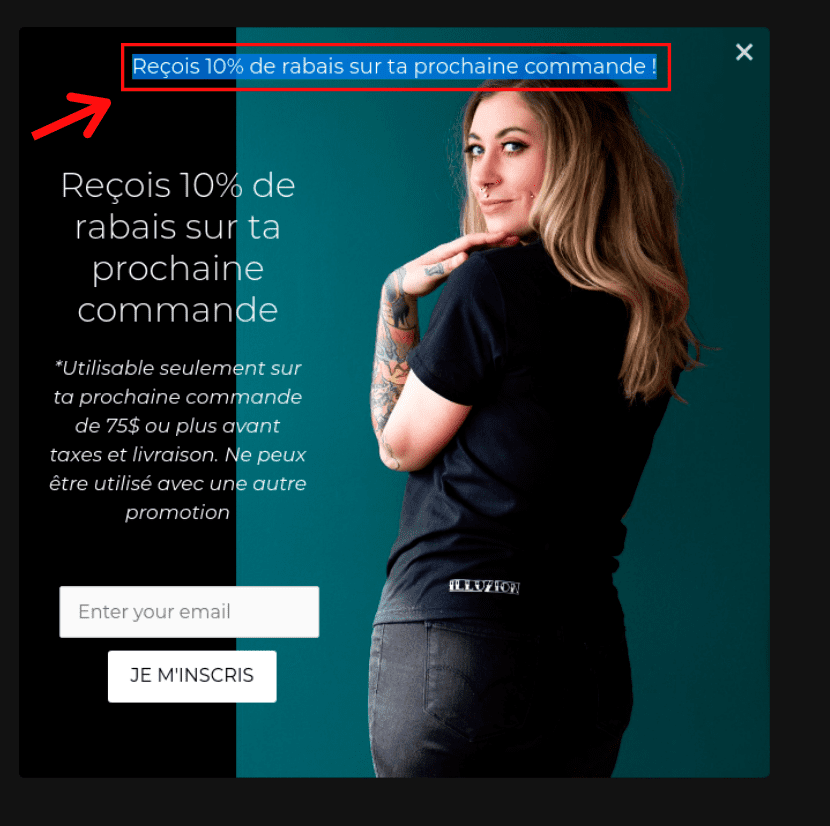
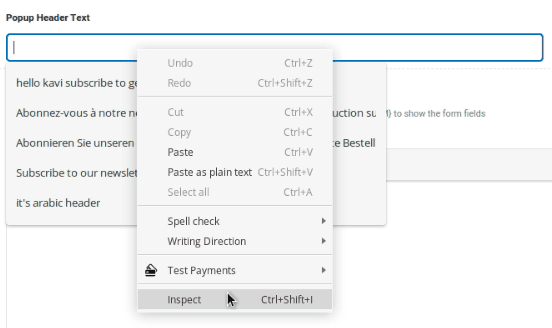
For example, suppose you want to translate the Popup Header Text.
- Right click inside the field, click on Inspect and copy the id property value.
2. Paste the id value in the Custom XML Conifguration’s name field and Save.
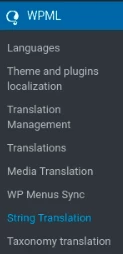
3. Next, in order to set the translated string go to the String Translation section under WPML.
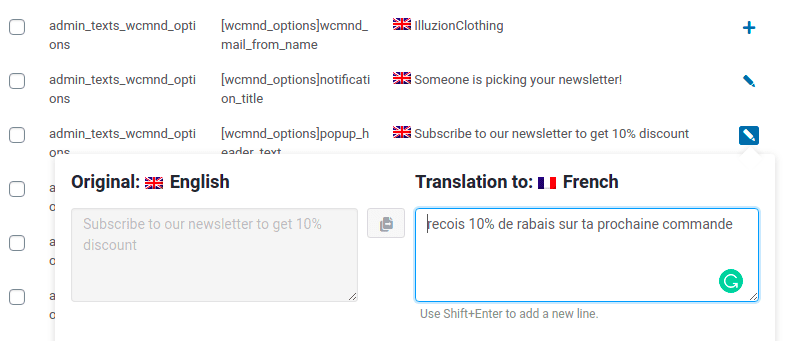
On the WooCommerce MailChimp Newsletter Discount Plugins contents page, there would be options to change the String and Language icon. In the following example, we are translating from English to French. But a different language could be selected as per your requirement and language options would be available here.
Add or edit the translations by clicking on ‘+’ or ‘pen’ icons.
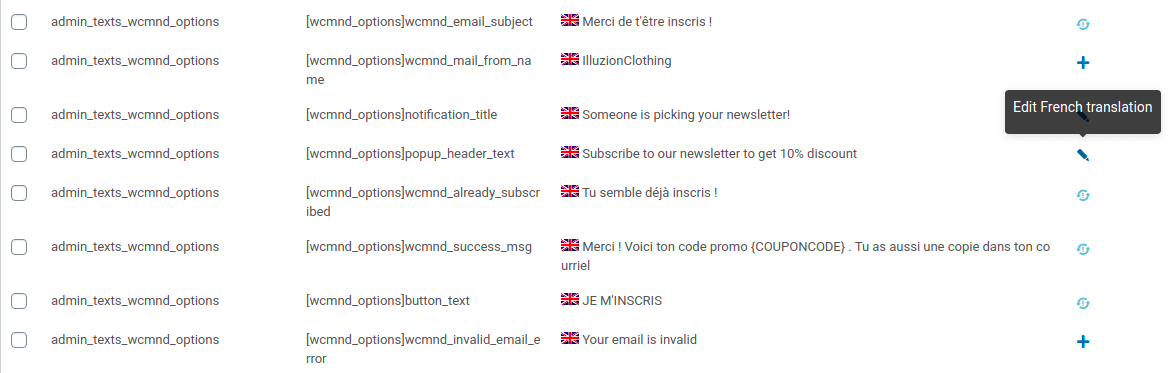
Enter the translated text as seen in the picture below and save the changes.
Finally, go to your WooCommerce MailChimp Newsletter Discount and preview the changes.