Yes, you can switch your license from one domain to another. You can learn more about it from here.
The popup feature is available only for premium users of the plugin.
If you have the pro version of the plugin and are not able to see the popup then make sure to check the following settings:
Make sure you have checked and enabled MailChimp Newsletter Discount
After enabling that, go to Popup Settings and Make sure that you have checked the Enable Popup Feature option.
Then click on Save Options.
For more details, check out this video.
Check SMTP settings of your Web Host / WordPress.
Make sure that the Enable Popup feature is checked.
In the Popup Text field, Copy the {WC_MAILCHIMP_NEWSLETTER_FORM} code and paste it into the editor. Save the changes.
The popup will now appear on your website.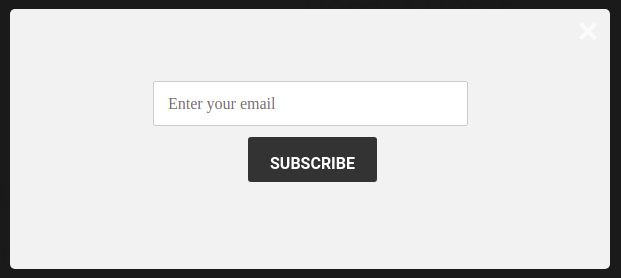
You can also add or modify the header text, colors, background image, and effects to your liking.
Yes, it can be used as a Subscribe form, you just need to copy the shortcode: [wc_mailchimp_subscribe_discount] and paste it on the page that you want the form.
If the Exit Intent feature is enabled. As a result, the popup may appear while switching tabs. Simply uncheck the Exit Intent box in the Popup Settings to resolve the issue.
If you want to display popup on specific pages of your website, you must use the pro version of the WooCommerce MailChimp Newsletter Discount plugin.
Go to the Popup Settings section in the Pro version and select the Only On Specific Pages and Posts option in the Where to Show Popup? field.
Below that field, select the page(s) where you want the popup to appear from the drop-down menu.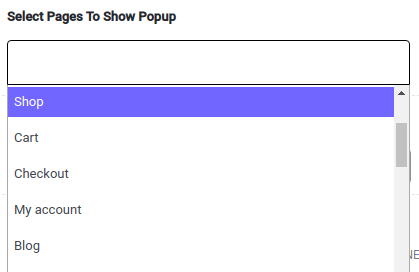
Finally, click the Save Options button, and the popup will now appear only on the pages you specified.
We’ve made a video that demonstrates how to display a popup when you click a button.
In the MailChimp Configuration section, check the Enable double opt-in feature for subscription option and Save Changes.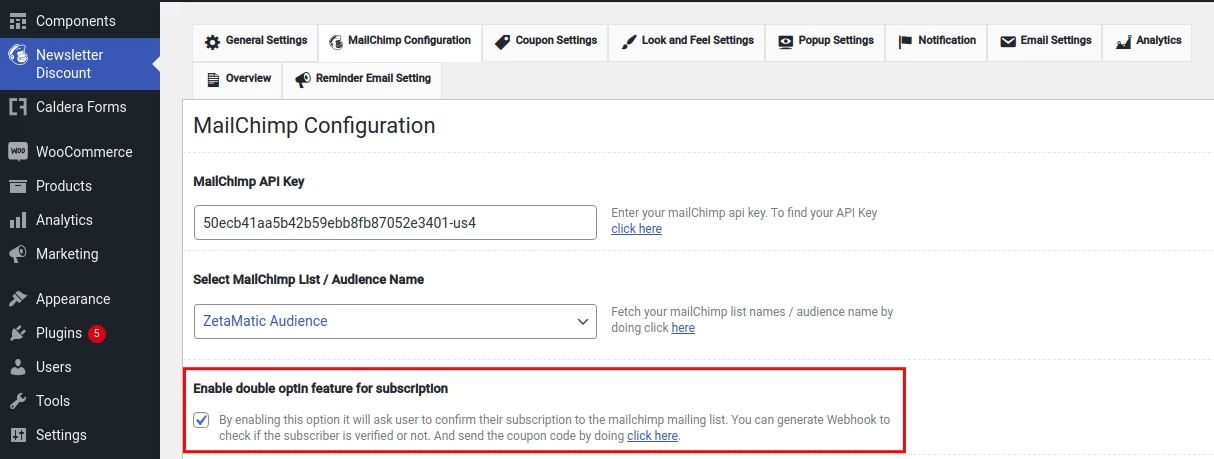
Next, click on the Validate Webhook link.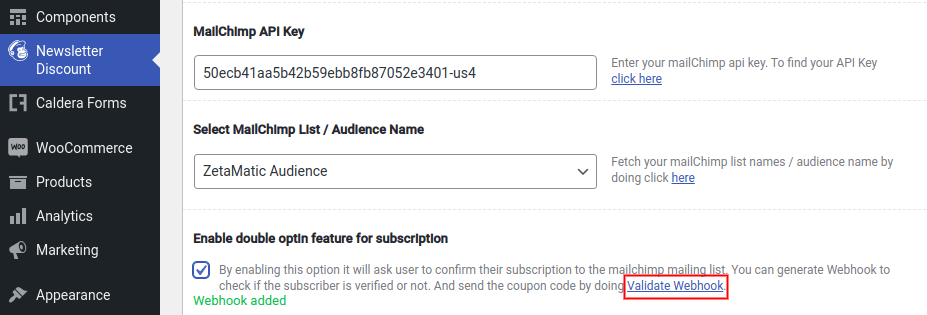
The webhook has now been added to your MailChimp account. You can verify this by going to Audience > Settings > Webhooks. Now, the Double opt-in feature is operational.
To validate the webhook, copy the webhook URL from your MailChimp account and paste it into the Webhook field in the MailChimp Configuration section. Then click the Validate Webhook button.
To use the Double opt-in feature, Make sure the Show Coupon Code After Subscribe option is unchecked in the Look and Feel Settings section.
Enable the Enable Popup Feature on click buttons or links?
To the subscribe button, add the wcmnd-popup-trigger class.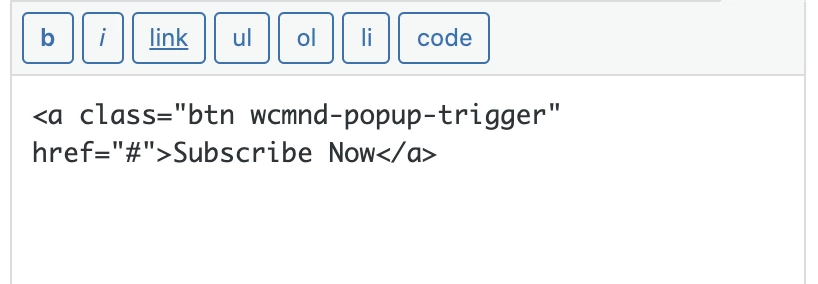
To prevent the popup from appearing automatically, check the Only On Specific Pages and Posts option and leave the Select Pages To Show Popup input field blank.
Disable Exit Intent.
The popup will now only appear when the user clicks on the button.
1. If double opt-in is not enabled, then check with your email service.
2. Or, If double opt-in is enabled, make sure the webhook URL is included.
You must click on the Click here link to Generate Webhook, which will add the webhook URL to the webhook section of your MailChimp account.
After that, enter the webhook URL and click the Validate Webhook button to see if the webhook was successfully added. Then, save your changes.
You can also check the webhook URL in MailChimp by going to Audience > All contacts > Settings > Webhook.
This feature is currently not available
Our Refund Policy is available here.


