


From this section, Admin can enable the Shipping Autocomplete Fields for the Checkout Page. This will walk you through all of the Shipping Fields settings.
If everything is in place, users in the shipping fields section will be able to autofill their addresses with a single click. When a user begins typing, the Google API populates the dropdown with relevant addresses. The user can then select their address, and all of the fields will be auto-filled.
Pro users have access to additional settings, including the ability to enable Location Picker Autofill, Turn existing shipping fields into address auto-filling fields, and Current Location Autofill, and more.
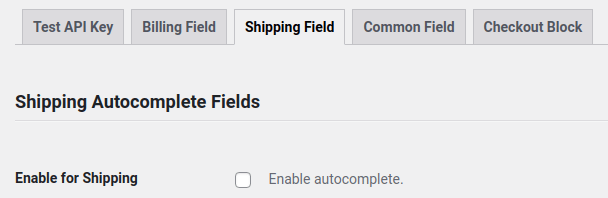
- Enable for Shipping: Select this checkbox to enable autocomplete for the Shipping Address.
- Autocomplete Field Label: The label that will be displayed in the shipping section’s auto-complete field.

- Auto Complete Field Placeholder: The text that will appear in the Shipping Autocomplete field’s placeholder.

- Enable for Autofill field required for shipping: Check this box to make the Shipping Autocomplete field mandatory.

- Google Autocomplete Field Position: Select the field position above which the Shipping Autocomplete field would be placed. Available options are shipping_first_name, shipping_company, shipping_country, shipping_address_1, shipping_address_2, shipping_city, shipping_state, shipping_postcode, shipping_phone, shipping_email. By default, the Shipping Autocomplete field appears above the First name in the Shipping section at the top of the Checkout Page.

- Enable Integration of autocomplete field with existing shipping fields: It allows admin to set an existing Shipping field as Google autocomplete field. This option can be used to autofill addresses without adding an extra address search field.

You can watch this video to learn how to convert an existing shipping field into an Address Autocomplete Field.
Also, watch the video below to understand how to do Field Mapping in an Existing Address Autocomplete Shipping Field.
- Shipping field Id: Specify the existing Shipping field id which would act as an autocomplete search field. You can integrate the autocomplete feature into any field by simply putting the field’s id here.
For example, if you add the id of the Address 1 field, i.e. shipping_address_1. When users enter their addresses in this field, location suggestions appear in a dropdown menu; when they select their address from the options, the address is auto-filled in the appropriate fields. Please note that this feature will not function unless you uncheck the Enable for a Shipping option.
![]()
- Enable Use Current Location: It simply displays a location icon, which, when clicked, allows users to easily fill in their current location in the appropriate shipping fields.
![]()
- Current Location Icon Position: Select the field position above which the Current Location icon would be placed. Available options are shipping_first_name, shipping_company, shipping_country, shipping_address_1, shipping_address_2, shipping_city, shipping_state, shipping_postcode, shipping_phone, shipping_email. By default, the Current Location Icon appears above the First name filed in the Shipping section at the top of the Checkout Page.
![]()
- Enable Location Picker for Shipping: It activates the Location Picker, which allows users to select their location directly from the map. And the full address will be automatically filled in the appropriate Shipping address fields upon confirmation.

- Upload Image For Location Picker: Using the Upload button, upload the Location Picker image. If the Location Picker was left empty, the default image would be rendered.

- Location Picker Icon Position: Select the Field position above which the Location Picker icon will be displayed. Available options are shipping_first_name, shipping_company, shipping_country, shipping_address_1, shipping_address_2, shipping_city, shipping_state, shipping_postcode, shipping_phone, shipping_email. By default, the Location Picker icon appears at the top of the Checkout Page, above the First name in the Shipping section.
![]()
- Location Picker Image Size In px: By adding the values in px, you can change the height and width of the Location Picker image.

- Allow Phone Number and Allow Company Name: If you check these boxes, the plugin will automatically fill in the phone number and company name in the appropriate fields if that information is publicly available for that location.

- Save Shipping Geolocation (Latitude, Longitude): When checked, this saves the shipping address’s geolocation (Latitude and Longitude). From the WooCommerce Edit Orders page, you could use this to see the exact shipping location. (Please keep in mind that if the billing and shipping addresses are the same, this Shipping Address View Location will be unavailable.)
