


This is the setup page for the Extra Fields For MailChimp Newsletter Discount add-on.
Go to the plugin page after installation and click on the Settings link of the WooCommerce MailChimp Newsletter Discount / Extended plugin.
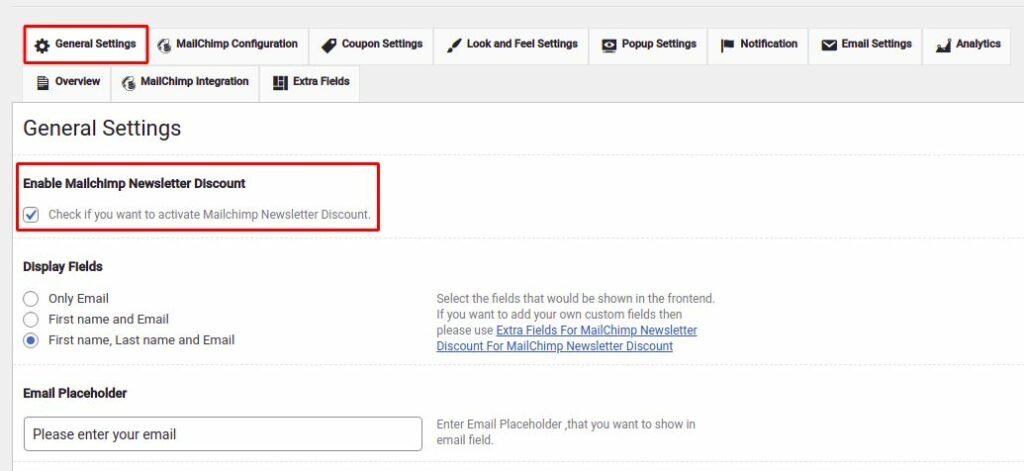
Check the Enable MailChimp Newsletter Discount in the General Settings section of the WooCommerce MailChimp Newsletter Discount / Extended and Save the changes.
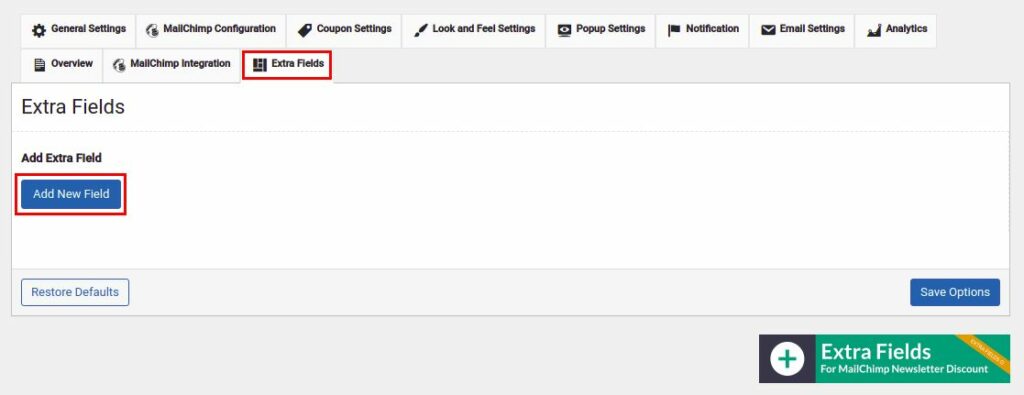
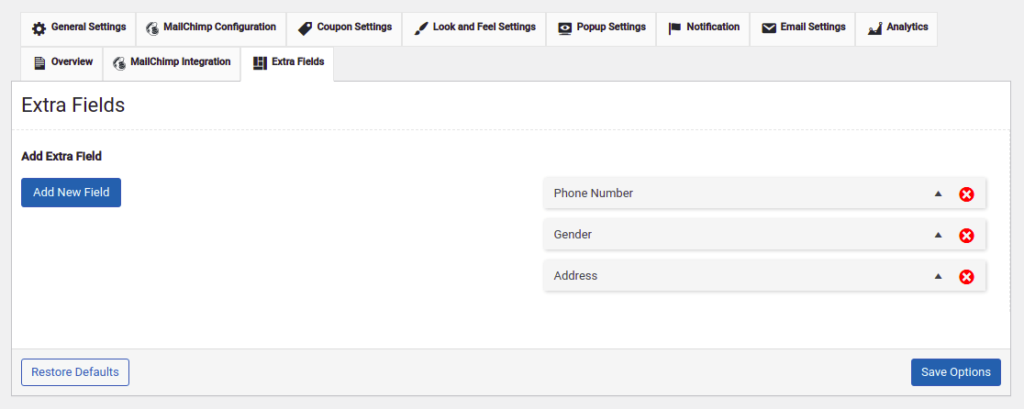
Go to the Extra Fields section and click the Add New Field button.
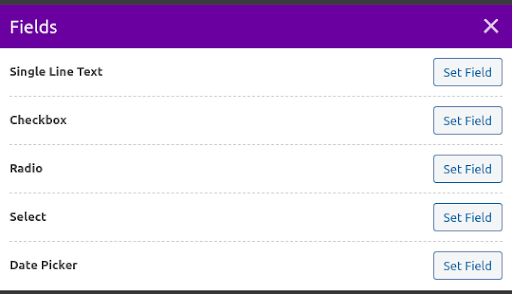
Choose between different types of fields such as Single Line Text, Checkbox, Radio, Select, Date Picker as per your requirement.
There are already some fields included in the WooCommerce MailChimp Newsletter Discount plugin. Such as First name, Last name, and email. Here many additional fields might be added.
Click on the Set Field button on the Field types.
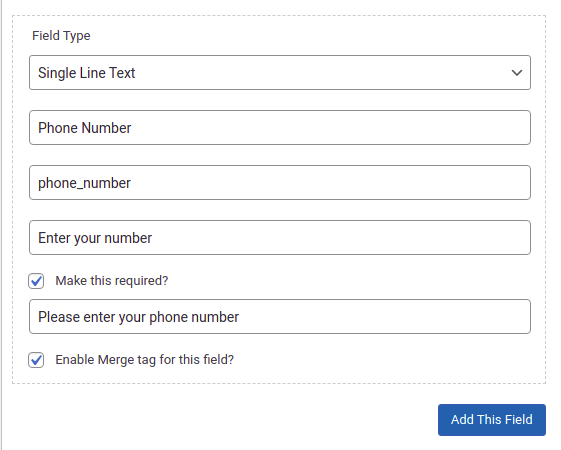
Here is an example of adding a new Single Line Text field type to the Phone Number field. Add the name, the slug name which would be automatically created, placeholder name, required flag, validation message.
And finally, check the Enable Merge Tag for this field option to merge this field to the form and successfully sync the field data with MailChimp.
Similarly, you can add more fields to the newsletter signup form.
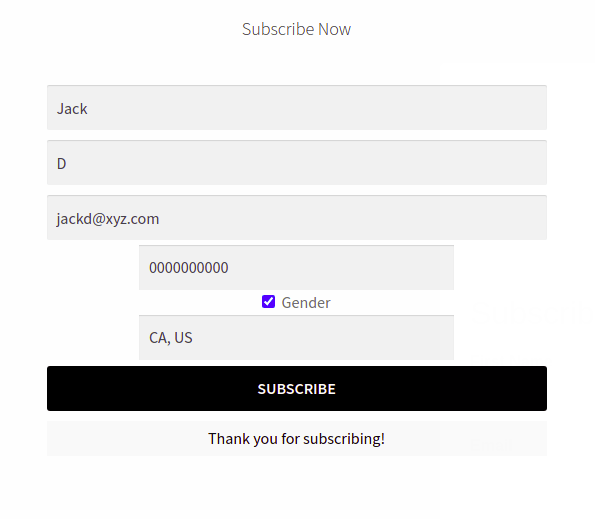
Click on the Save Options button and verify the changes on the page. Or popup form (in case of the pro version of the WooCommerce MailChimp Newsletter Discount plugin). Fill the form and Subscribe to check if the data is syncing with MailChimp or not.
If the fields appear in the middle rather than the left. Then you must add the following code to the Custom CSS section of the WooCommerce MailChimp Newsletter Discount Extended plugin’s Look and Feel Settings.
#wcmnd_modal .wcmd-addon-fields-wrraper {
width : 100% !important;
}
#wcmnd_modal .wcmd-addon-fields-wrraper .wcmnd-addon-checkbox-wrap{
display : flex !important;
}
#wcmnd_modal .wcmd-addon-fields-wrraper .wcmnd-addon-checkbox-wrap .wcmnd-addon-
extra-field{
max-height: 15px;
margin: 5px !important;
max-width: 15px !important;
min-width: 12px !important;
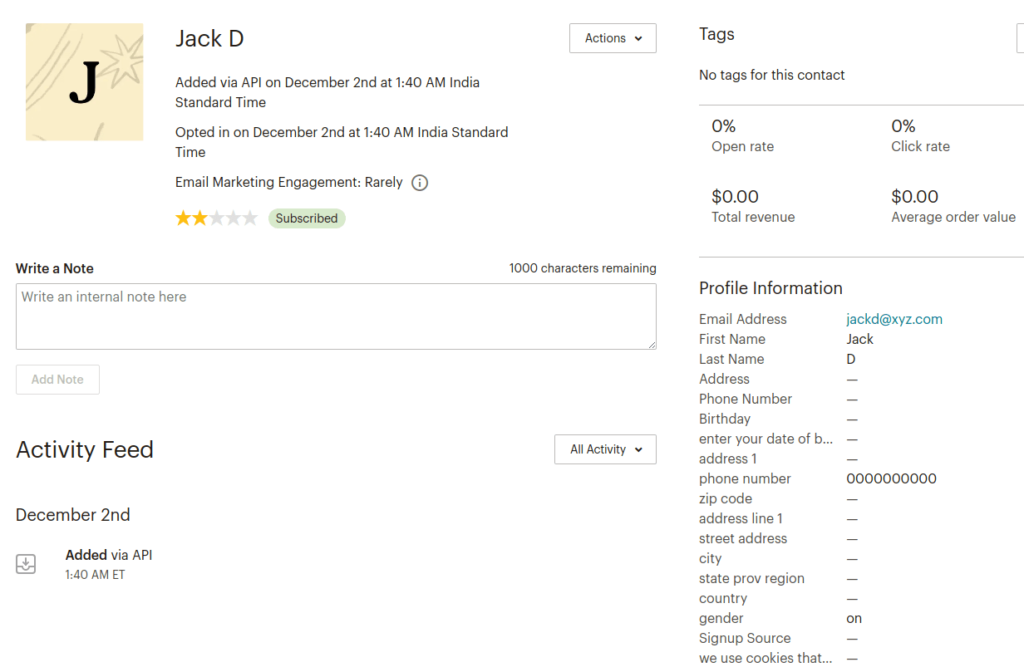
}Go to the MailChimp account and check the list for the latest addition done above. Finally, click on the record to view all details.