


If you have a WordPress site and need some assistance, and you have friends or relatives who know a thing or two about WordPress. However, you don’t want to give them full access to your website dashboard because they might make mistakes. Fortunately, there is a way to grant temporary access to the WordPress Dashboard without using any passwords!
In this article, we will learn how to grant someone temporary access to your WordPress Dashboard with limited functionality. Allowing that person to only add/edit posts, or pages, as well as manage comments, plugins, and categories.
When Temporary Access of a Site Is Necessary
WordPress makes it easy to grant permanent access to your WordPress dashboard to one or more people. But in certain situations, you might need to grant someone temporary access instead.
As the owner of your WordPress site, it’s up to you who has permanent access and who doesn’t—but whether someone should have temporary access depends on the situation.
Here are some of the examples of when you might need to grant someone temporary access to your WordPress dashboard.
1. When demonstrating how to do something in WordPress to someone
When trying to show someone how to do something, it’s often best to simply give them access and let them follow along.
They can always restore your access if they have trouble following along. This is most likely one of the most common reasons why someone would require temporary access.
2. When hiring freelancers for projects
If you hire a freelancer or an employee to work on a specific project. They will frequently request your website’s username and password. This can be quite unsettling.
Giving them temporary access with limited functionality is the best way to protect your website. However, if you give them these credentials by accident. They will have full access to all of your files and will be able to make changes that could harm your site or business.
However, if you grant them temporary access, once they have completed the project. You can easily remove their account from your dashboard so they do not have future access to any of your other files or posts.
3. When collaborating with other writers on the same blog
You may occasionally find yourself working on a project with another writer. Maybe you’re starting a new website and need someone to help you write content for it. In such a case, you may find yourself in a situation where multiple people are using your dashboard. You can give other users temporary access without giving them full control over your site by sharing temporary access with them.
4. For business purposes or convenience
If you work as a freelancer or consultant for a client, they may require temporary access to make changes to their website. Even if your clients are technically savvy. They may find it difficult to learn all of WordPress’s capabilities in order to manage it on their own.
Giving them restricted access allows them to perform certain functions, such as posting content or uploading images, without requiring your constant assistance.
Create a Temporary Login for WordPress using Plugins
There are several plugins available to assist with granting temporary access to your WordPress site. And we’ll go over the most well-known ones. We’ve listed two plugins that we found to be the most user-friendly.
Temporary Login Without Password

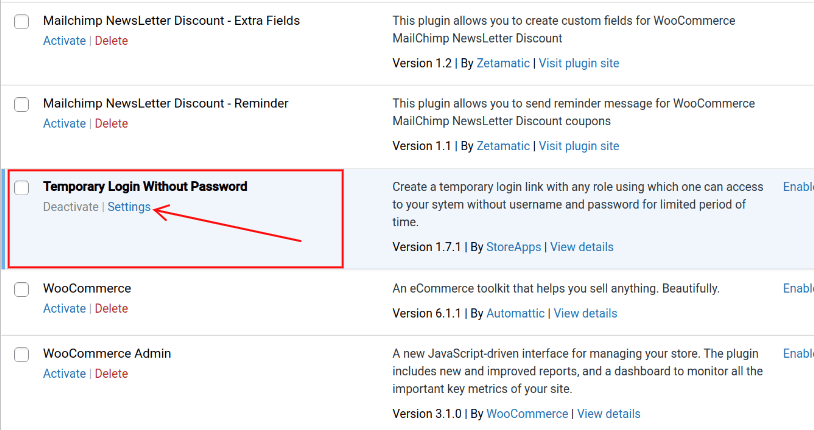
Install and activate the Temporary Login Without Password plugin from the WordPress plugin repository. Then, from the plugin’s page, navigate to the plugin’s Settings page.
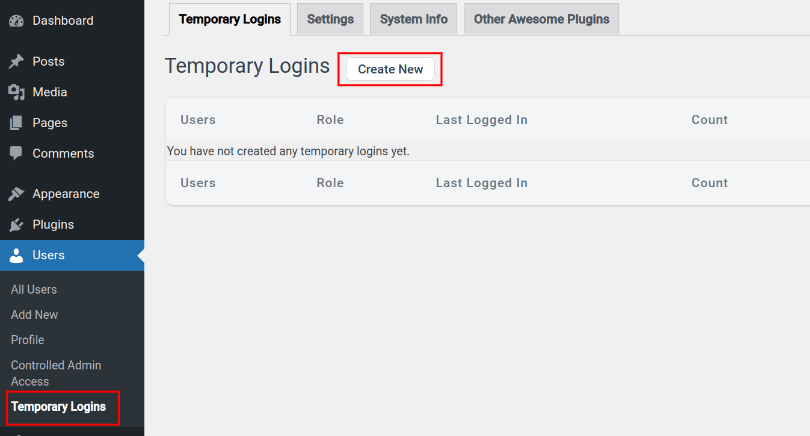
You can also get to the plugin’s settings page by going to Users > Temporary Logins. Then, in the plugin’s settings dashboard, click the Create New button.
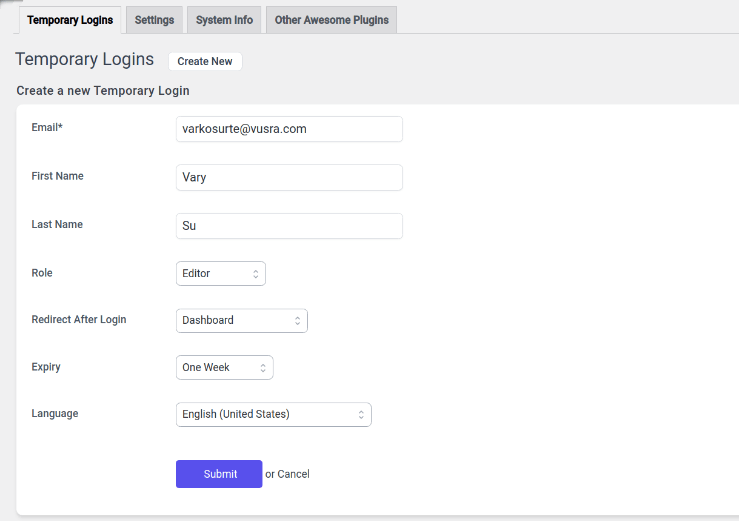
And it will take you to a new page where you can control the various temporary access options. Enter the user’s email address, first and last name, the role you want to assign, the after login redirect page, the expiry time period, and the site’s language.
After entering the above information, click Submit to be redirected to a new page where you can select the temporary access link. If you share the link with the user. They will be able to easily access your WordPress site without needing to log in.
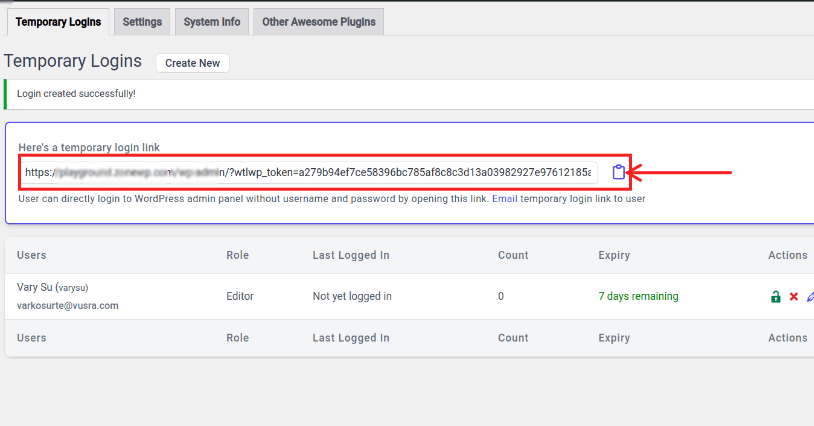
The access will be valid for the duration you specified. By clicking on the Edit(pen) icon in the Users section, you can change the time frame and other settings even further. Along with the user, there are some additional options on the right side. By clicking on the link icon, you can lock the access, delete it, edit it, send the temporary access details to the user, and copy the link.
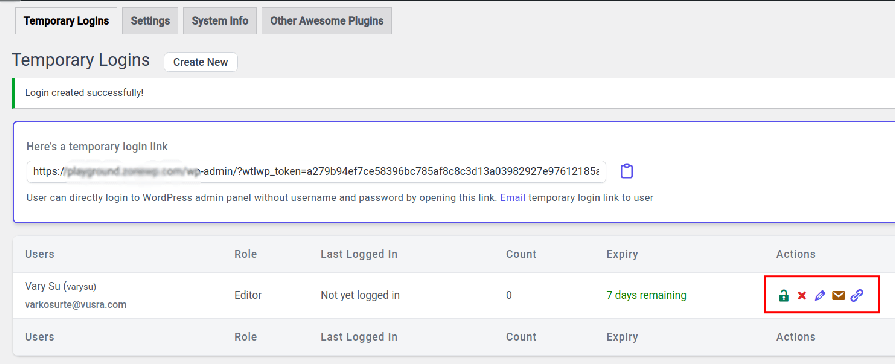
As you can see, this is an example of a temporary access page with the Editor role.
Controlled Admin Access

Another similar way to grant temporary access to your WordPress site is to use the Controlled Admin Access plugin. Installing this plugin from the WordPress plugin repository is similar to installing other plugins on your WordPress site.
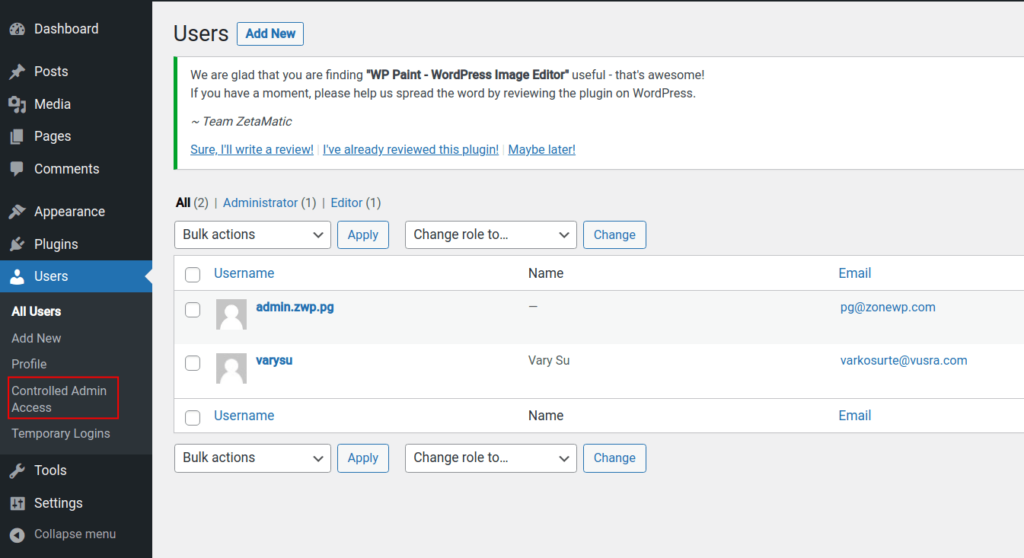
After installing and activating the plugin, navigate to Users > Controlled Admin Access to access its settings page.
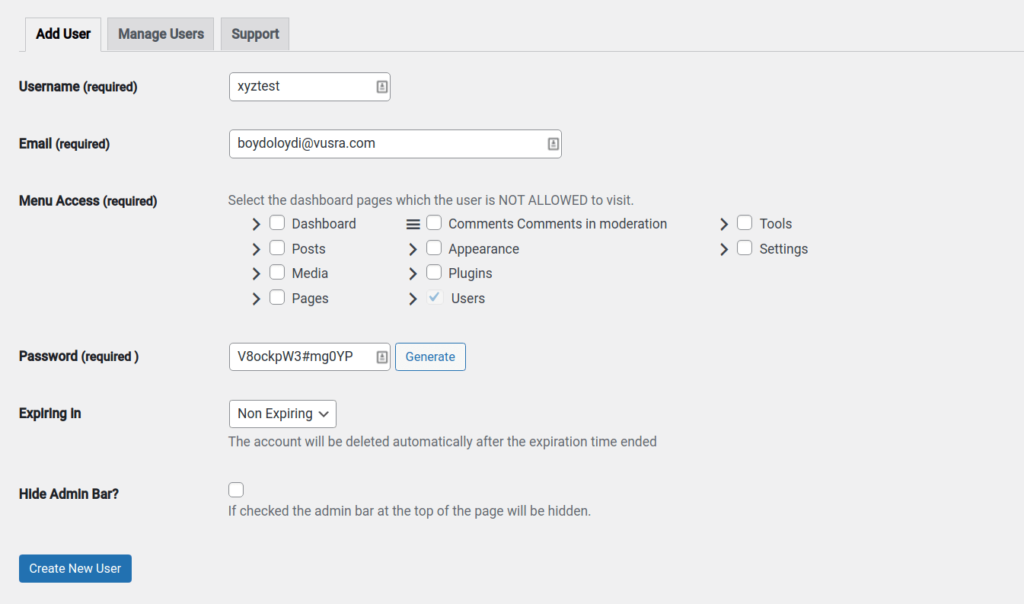
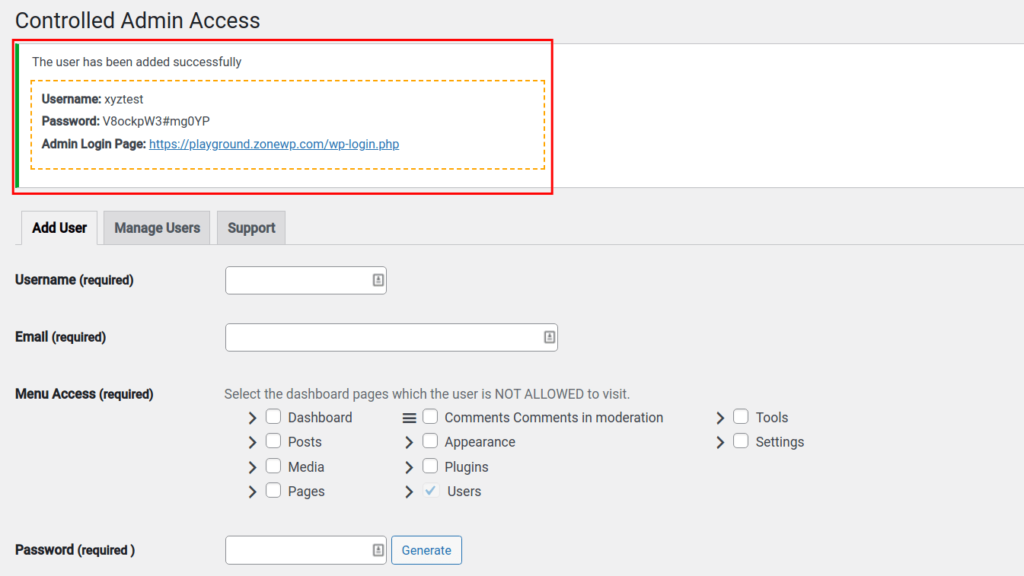
Once on the plugin’s settings page, enter the user’s basic information such as username, email address, menu access that you want to provide, password, expiry period, and the option to hide the admin bar. After you have completed these details, click the Create New User button to create the temporary access.
The plugin will then show the temporary access information. You can then share these with the user and allow them to sign in to your site.
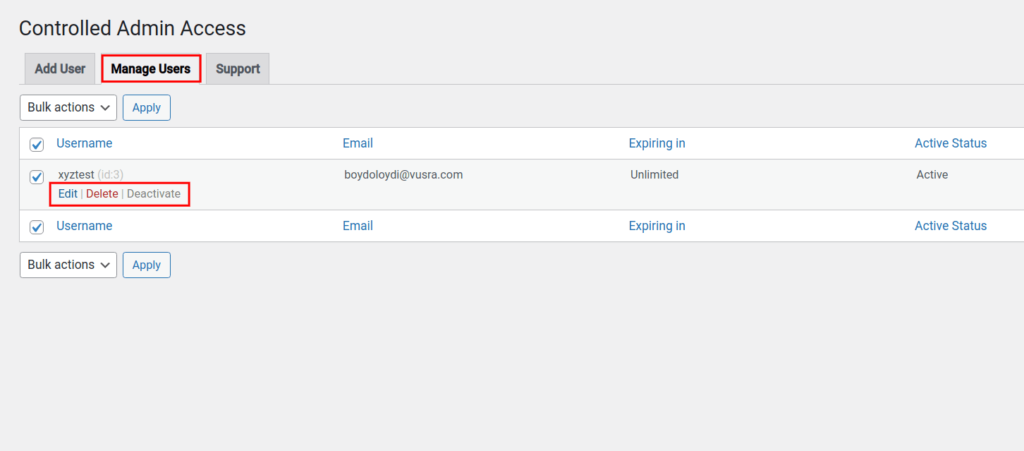
You can edit or delete the user by going to the Manage Users tab in the plugin.
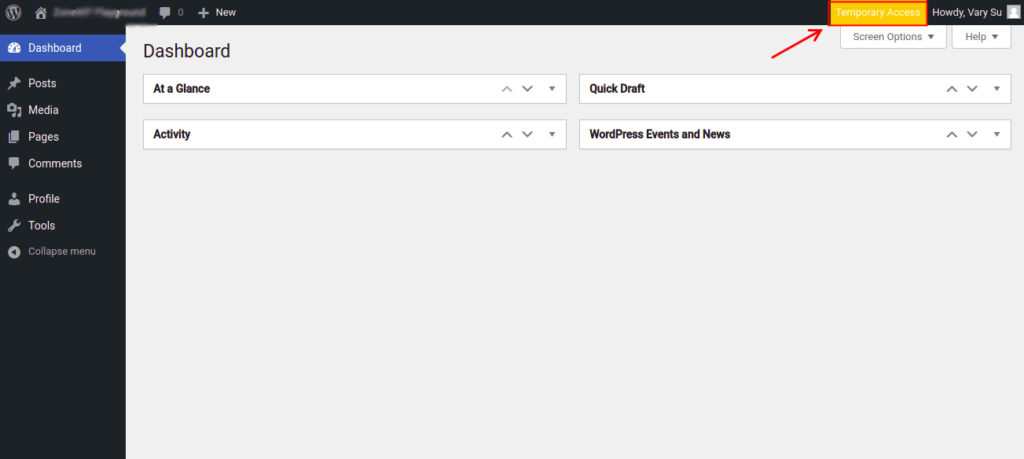
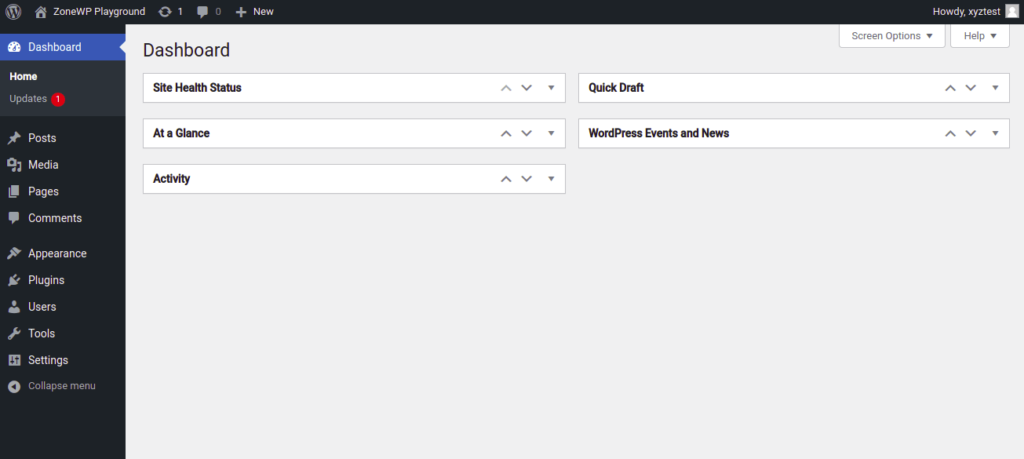
This is an example of a temporary access profile, as you can see. It appears to be the same as any other regular user. In contrast to the Temporary Login Without Password plugin, which displays a Temporary Access icon at the top of the website.
Conclusion
Thus, if you are looking for an easy way to grant temporary access to your WordPress site without using any password, these ways can surely help you.
However, you should be aware that giving too much authority to your site is a double-edged sword because even a trustworthy person can make some changes to it (either accidentally or intentionally). Which could harm your website’s reputation and ranking.
Therefore, we always recommend that you limit how much. And for how long users will have administrative rights over your WordPress site.
Hope you find this post useful. For any suggestions or information do not hesitate to contact us. Please take a moment to share it on social media. Subscribe to our YouTube channel for videos related to WordPress plugins and themes. Follow us on Facebook and Twitter for more updates.