Once the WP Paint plugin has been installed and activated. You can then use it directly on your website. And use that follow the points below
- Go to Media > Library
- Select the Image that you want to edit, and then click on Edit Image using WP Paint button to start using the WP Paint plugin
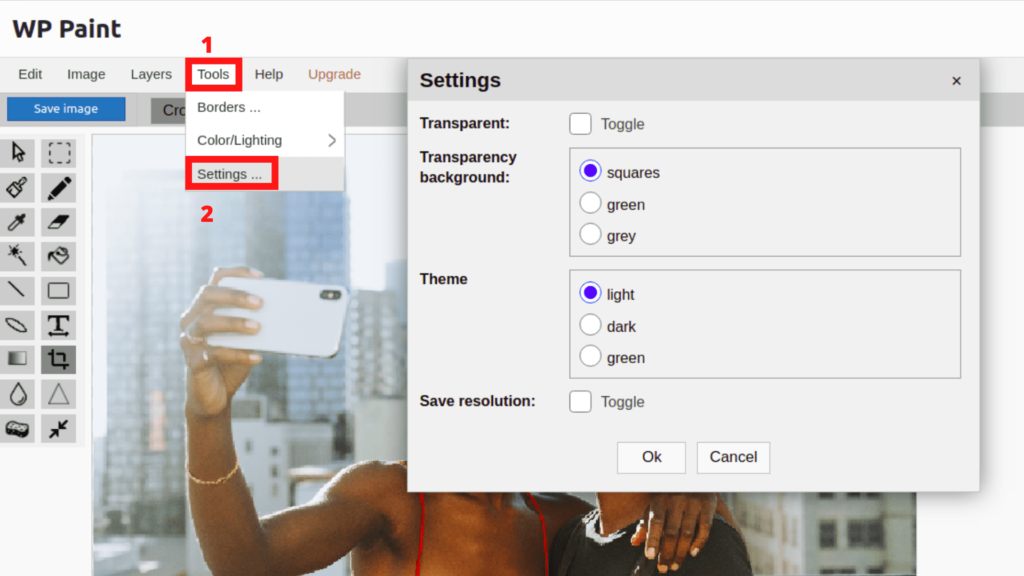
Once you open the WP Paint plugin, you can check the settings wizard before you start editing. In the free version of the WP Paint plugin, you get few settings by going to the Tools > Settings. Here you will find the following options.
- Transparent: You can toglle this feature On or Off by checking the option. After enabling this you can see transparent patterns/colors behind the image. Uncheck the toggle to display white color background.
- Transparency background: You can choose between three options Squares, Green and Grey.
- Theme: You can choose the WP Paint interface theme between light, dark and green colors.

In the Pro version, you get some more setting options.


