


The Caldera Forms Salesforce Integration Pro allows syncing for cases or query or contact information. Here is a quick look into How to Setup the Web to Cases.
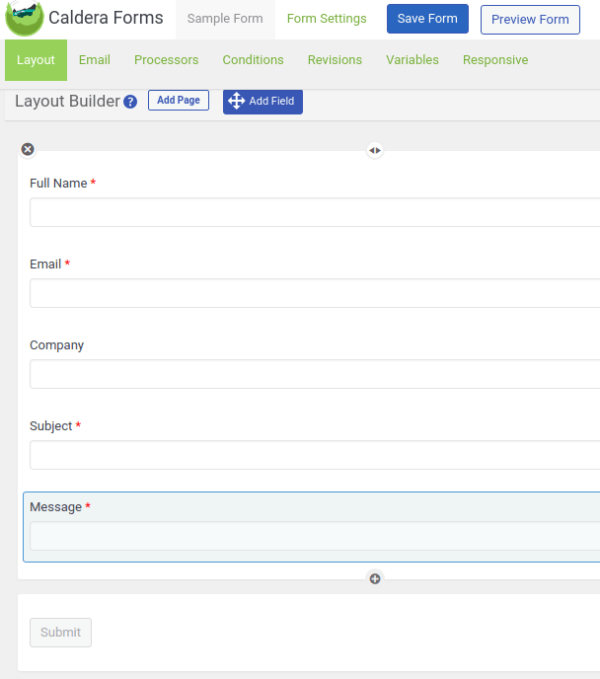
Create a new Blank Form and add required fields. Click on the Save Form button. Go to Processors > Add Processor > Salesforce Integration by ZetaMatic and click on Use Processor.
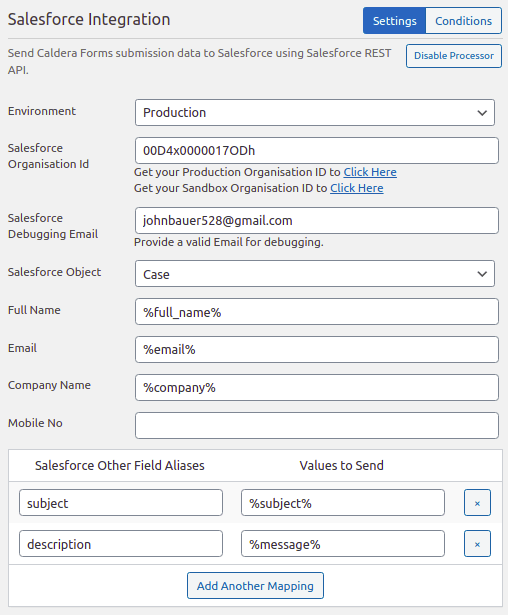
Set Salesforce Object value to Case as shown below.
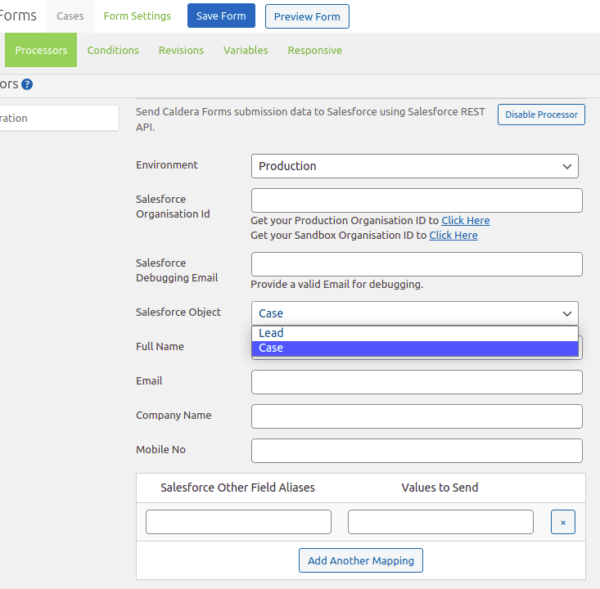
Fill up the other details such as Salesforce Organisation Id, Full Name, Email, etc. as mentioned in an earlier example.
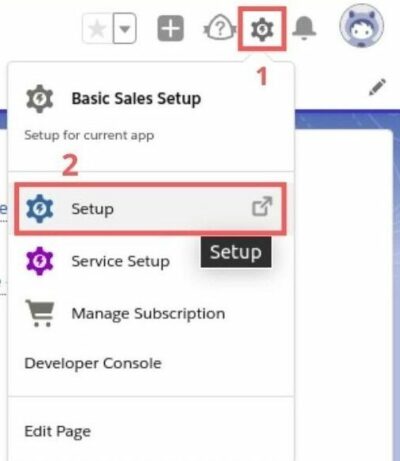
For Salesforce Other Field Aliases, it is required to generate new HTML form values by visiting the Salesforce account > Setup icon > Setup link.
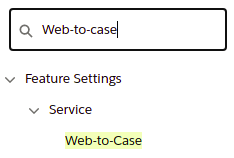
Search for Web-to-Case and click on it.
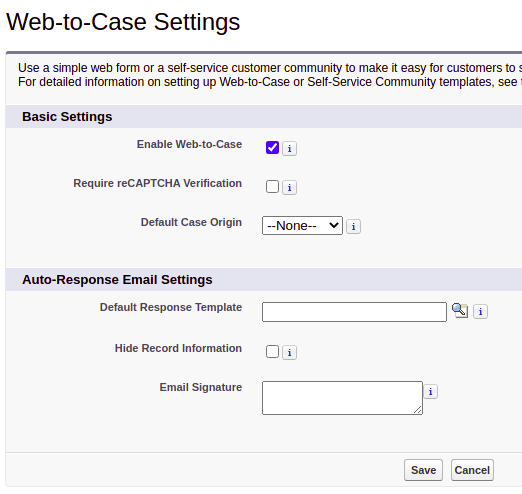
And on the next screen check the Enable Web-to-Case option and Save.
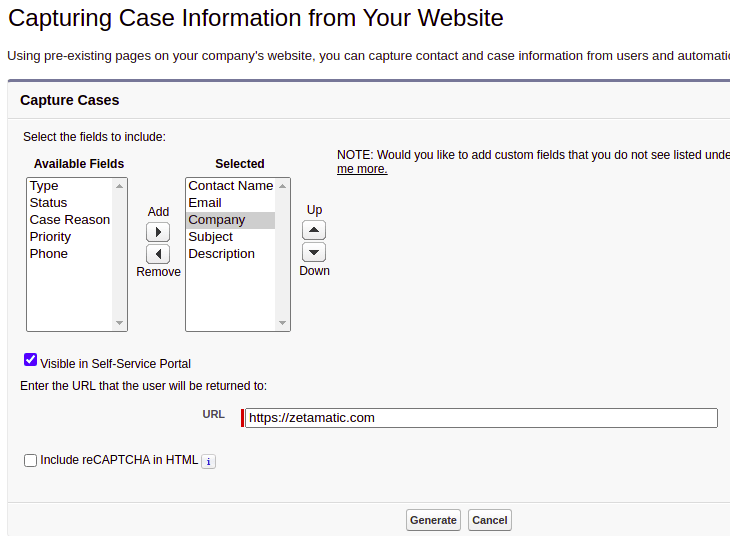
Search again for Web-to-Case and click on the Web-to-Case HTML Generator link. Here select the fields that are to be shown on the form. You can add, remove and set the position of any field. Enter the URL that the user would be returned to and uncheck the Include reCAPTCHA in HTML. Click on Generate to generate the HTML code.
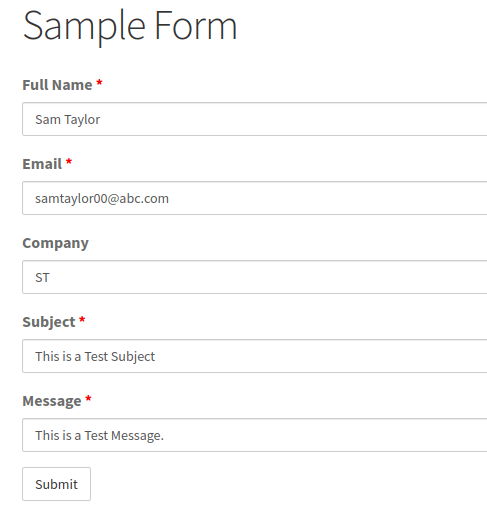
Now copy the subject and description name and paste in the Processor section of plugin settings. After filling all the fields it will look like the one in the image below.
Click on the Save Form and Preview Form button to verify changes. Add the details and click on the Submit button.
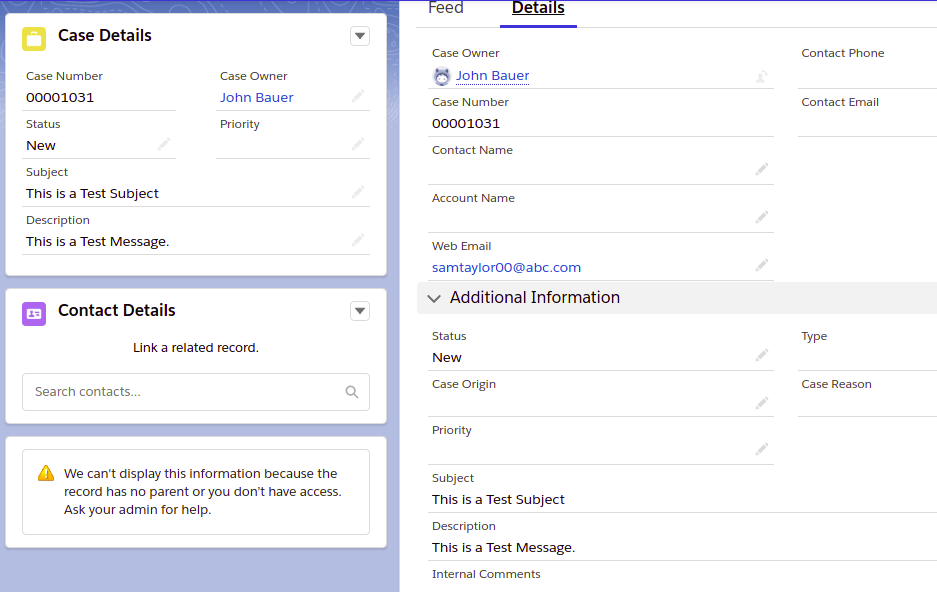
Now, as you can see a new case has been created in the Salesforce account.

Click on the Case Number to see more details about the case.