


Caldera Forms HubSpot Integration Pro is an add-on for the Caldera Forms plugin that integrates with the HubSpot. It also syncs the Caldera Forms data to your HubSpot CRM where you can use it for your marketing and sales purposes.
HubSpot is a free CRM tool that allows users to manage contacts, live chat, deals, tasks & activities. It also includes free marketing tools such as forms, email marketing, ad management, landing pages, inbox conversations, and many more. Paid plans come with more advanced marketing and sales features.
And Caldera Forms is a free and easy-to-use plugin that allows users to create responsive forms simply by drag-and-drop. With this plugin, you can create a variety of forms and you can also choose from a tonne of fields that you can use on your forms. It is currently active on more than 200,000 websites. This shows that this plugin is one of the best for creating beautiful forms.
In order to increase overall efficiency and possible conversions, HubSpot keeps all your customer correspondence in one place and automates tasks typically performed by your sales team. Since both HubSpot and Caldera Forms are very popular, we’ve created this add-on that links both of them.
In this post, I’ll share a step-by-step guide on how to set up the Caldera Forms HubSpot Integration Pro plugin. This will help you seamlessly integrate Caldera Forms and HubSpot CRM so that you can easily synchronize your form data. And make your marketing and sales efforts faster.
Want to learn quickly, Check out this video tutorial
Before starting this whole thing, you will need some prerequisites, you will need the Caldera Forms plugin installed and activated on your WordPress website. Along with that, you will also need the Caldera Forms HubSpot Integration Pro add-on and HubSpot API Key.
How to get HubSpot API Key
Go to https://developers.hubspot.com/ and Log in / Create a developer account
Now if you are new, it will show three options, An app, A custom integration, A website.
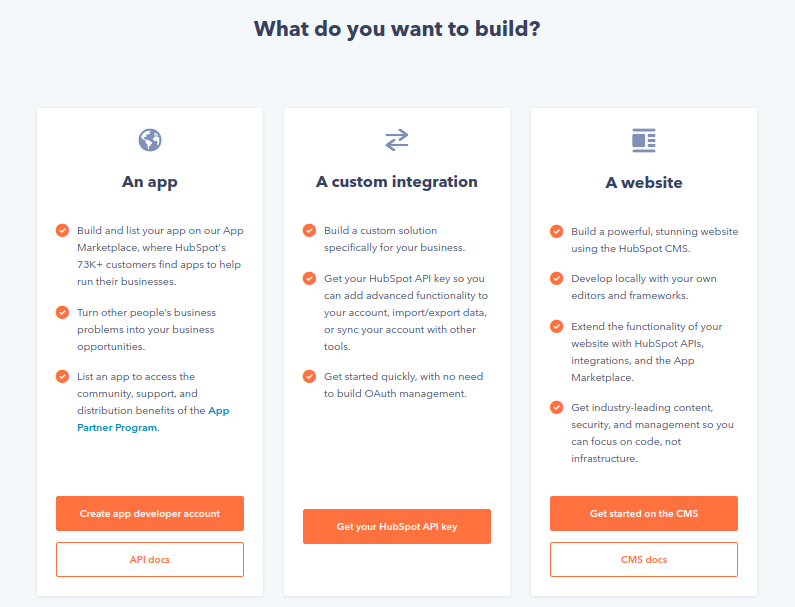
Choose the A custom integration and click on the Get your HubSpot API key button. After that, you will be redirected to the below page.

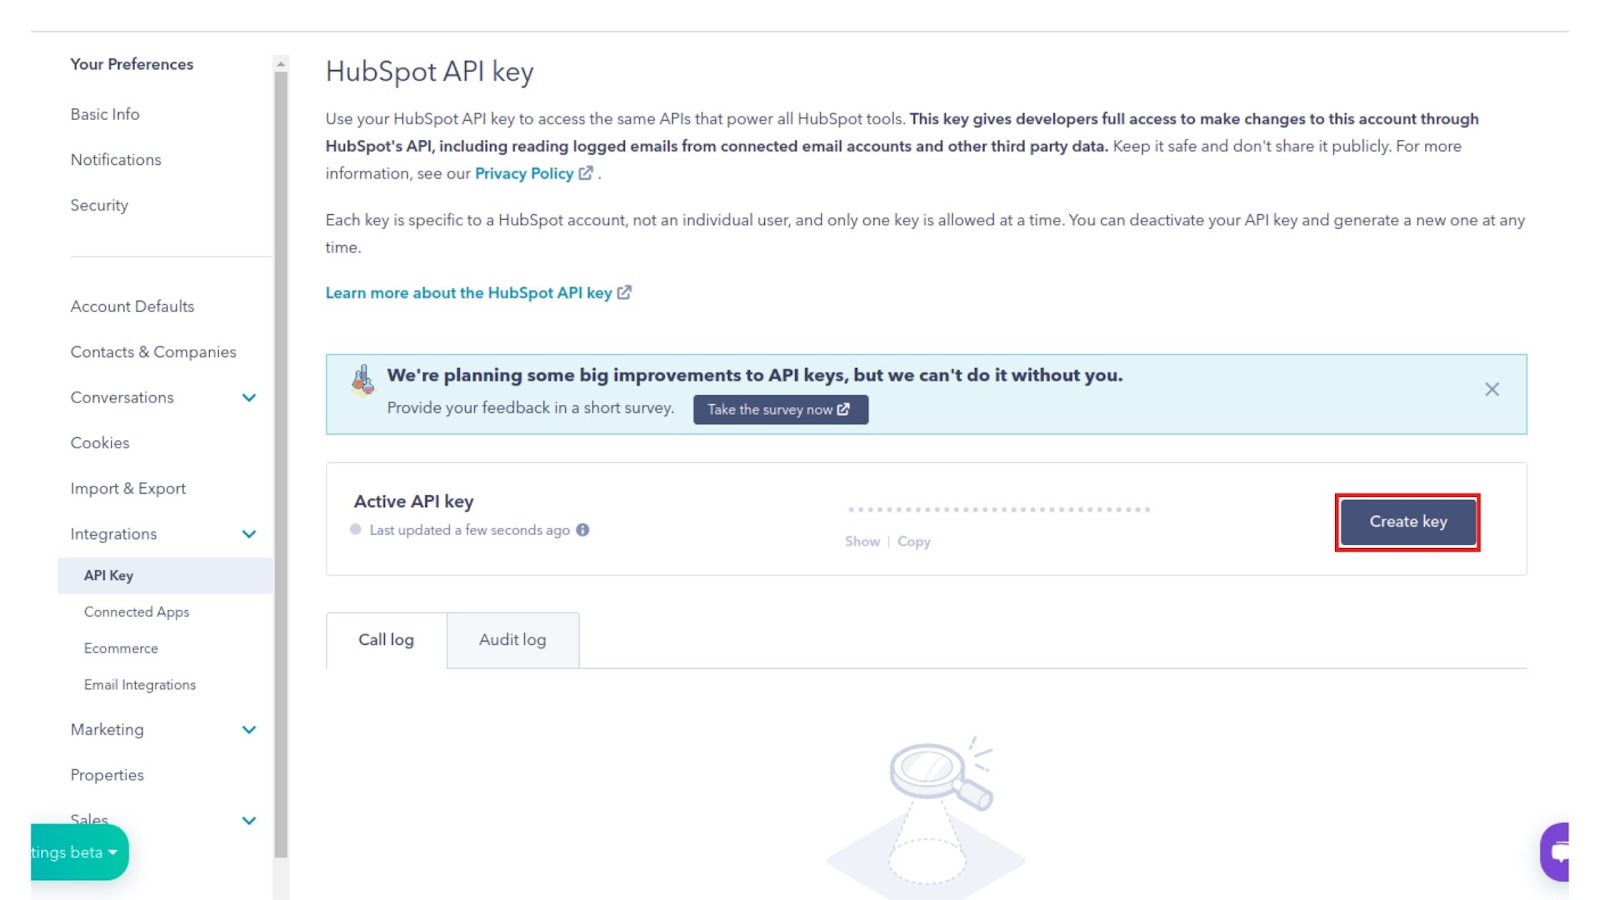
Click on the Go to my account and then select the Settings icon, next look for Integrations > API Key.
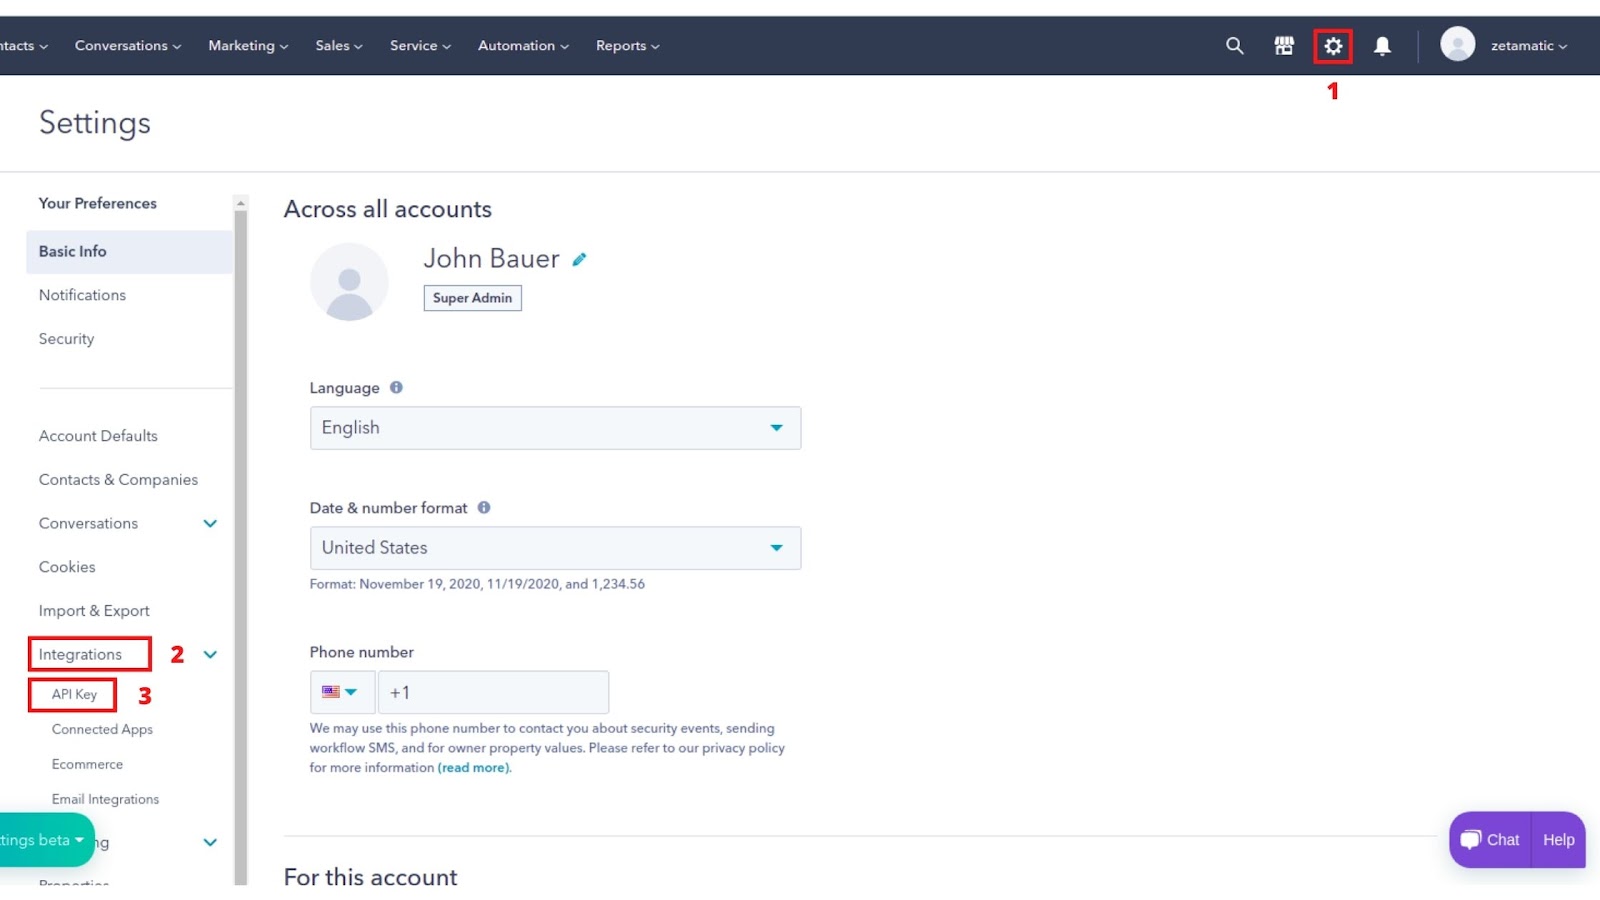
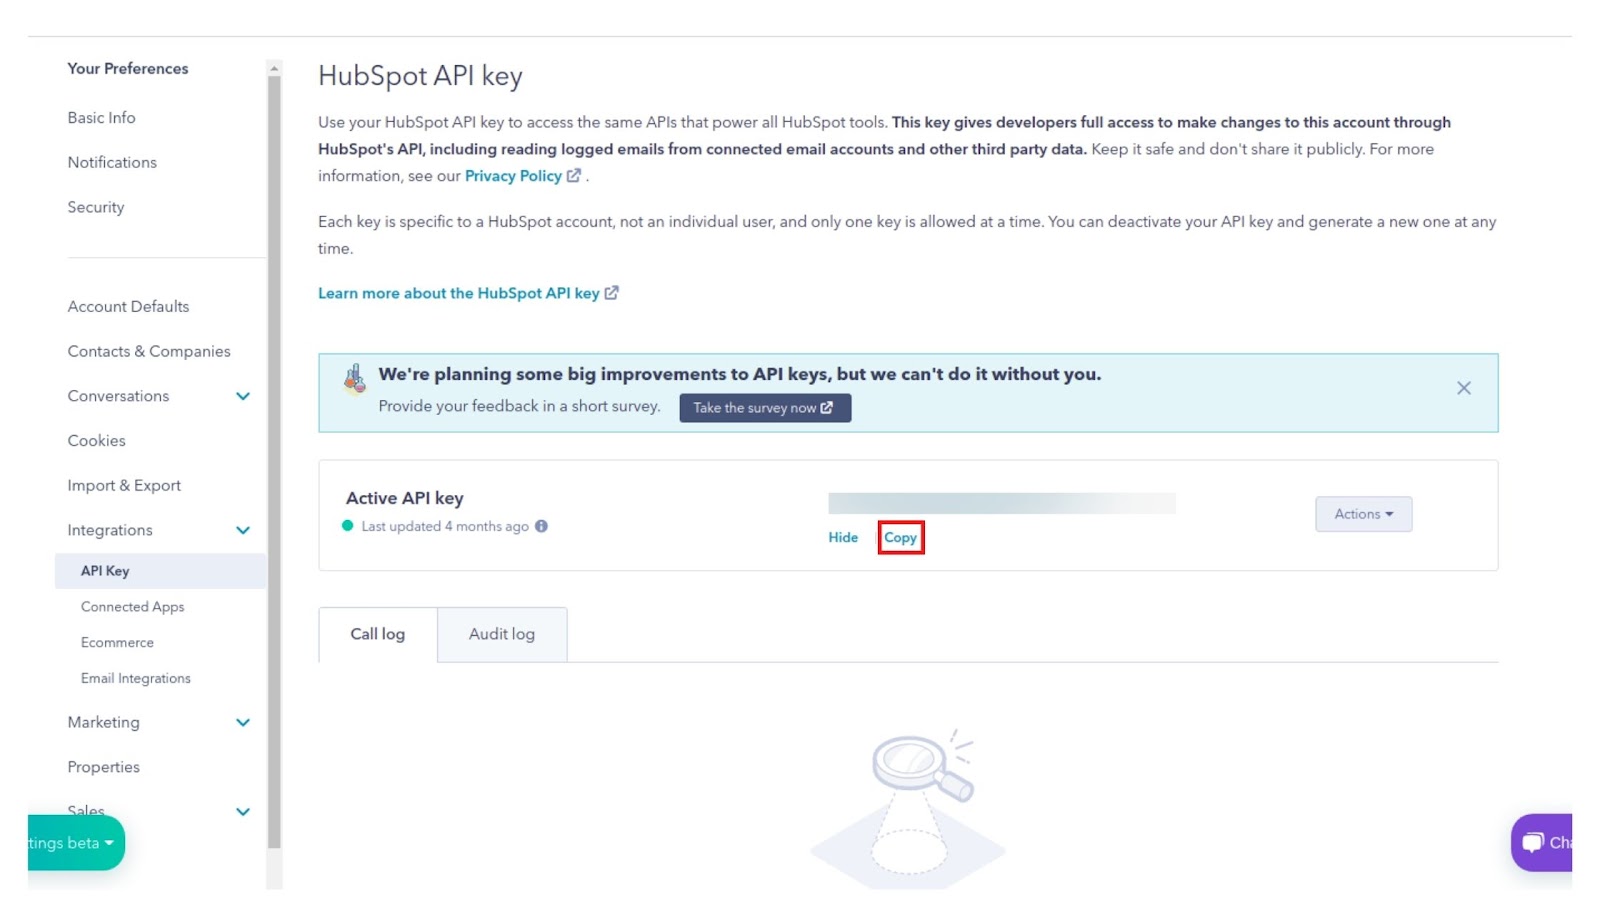
Then click on the API Key and on the next page, you will see the HubSpot API key. Click on the Create key button to get the API key that you can use on the Caldera Forms HubSpot Integration Processor.
After clicking on the Create key button, it will generate the API key required to integrate Caldera Forms and HubSpot CRM. Copy the key and go back to the Caldera Forms plugin.
Creating a new form using Caldera Forms
Now that you have the HubSpot API key, go to Caldera Forms from your WordPress dashboard, create a new blank form using the New Form button on top.
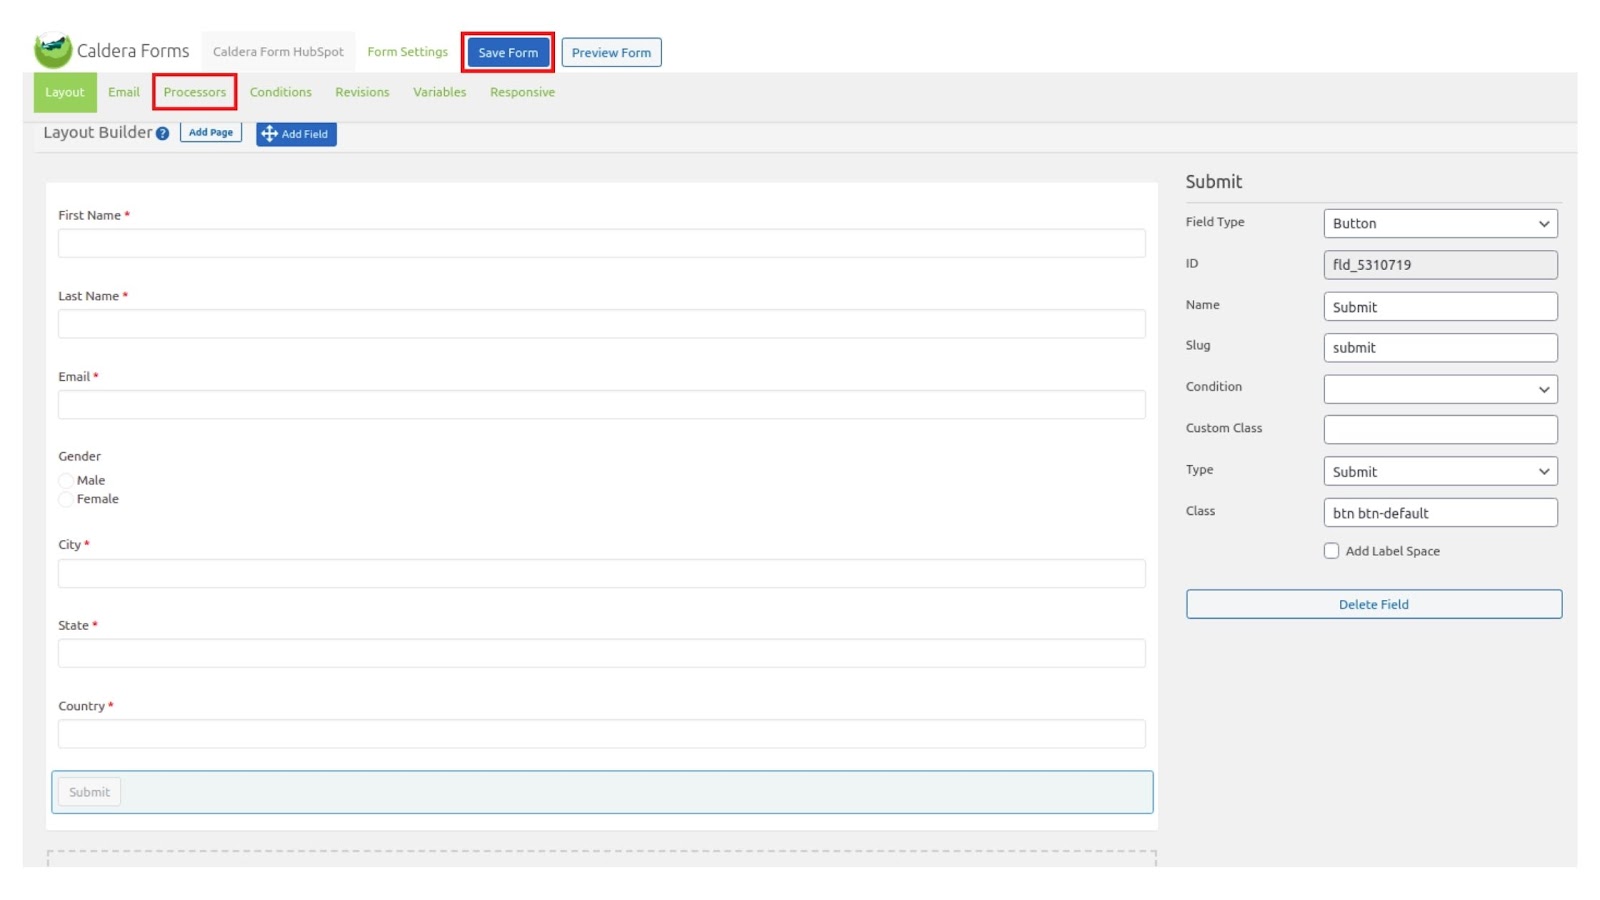
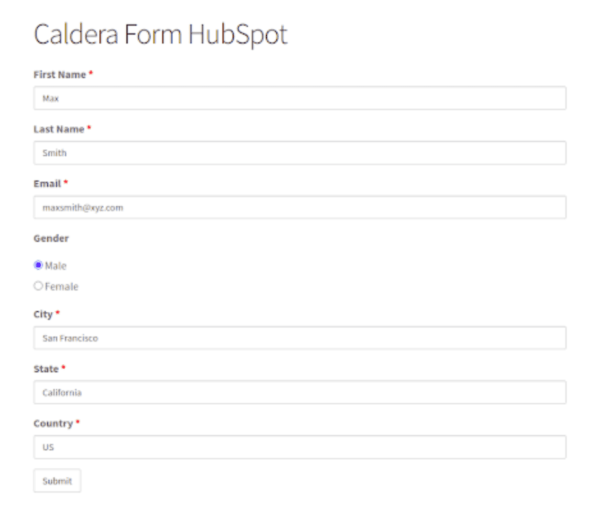
Then add the form fields. I have added some basic details such as First Name, Last Name, Email, Gender, City, State, and Country. You can add many fields as you want to collect data and push to HubSpot CRM, there is no limit on that in the Pro plugin. After adding the fields click on the Save Form button.
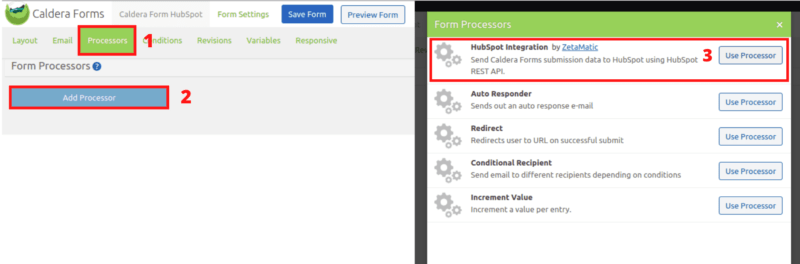
After saving the form, next click on Processors > Add Processor > HubSpot Integration by ZetaMatic and click on the Use Processor button.
On the next screen, you will require the API key that we copied from the HubSpot account. Add the HubSpot API key, And fill all the HubSpot Field Aliases and their values. In some aliases, you may not find its value but you can create that using two % character and the value in small letter. For example, for City, the value would be %city%.
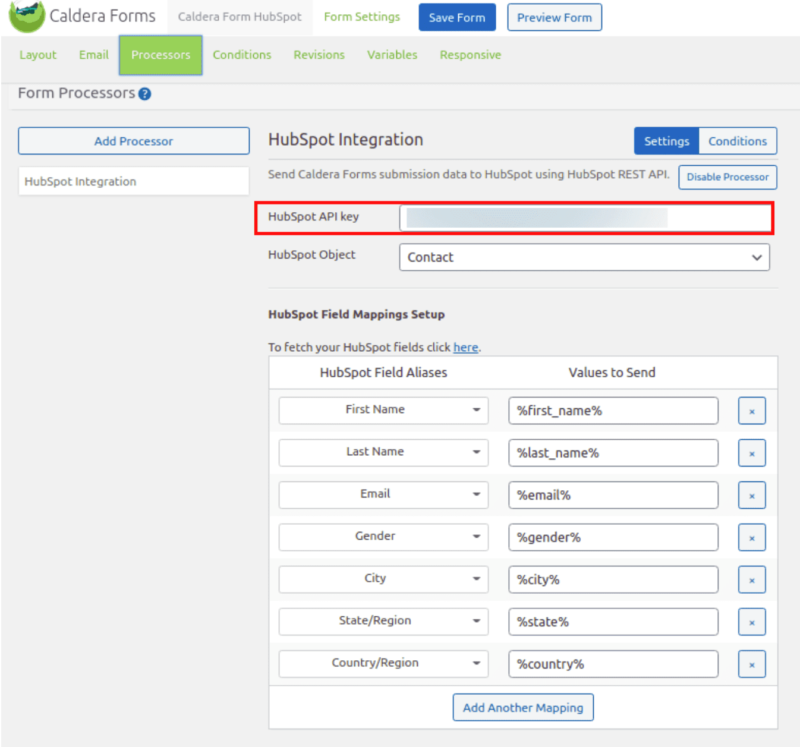
After filling in all these fields, click on the Save Form button on top. Then you can preview the form by clicking on the Preview Form button. And also test it by filling it and submitting it. You can also use the form on any page or post or sidebar. Just get the form shortcode from the Forms section, and paste it wherever you want.
After submitting the form, you can go to your HubSpot account and then go to the Contacts page. Where you can see the latest lead.
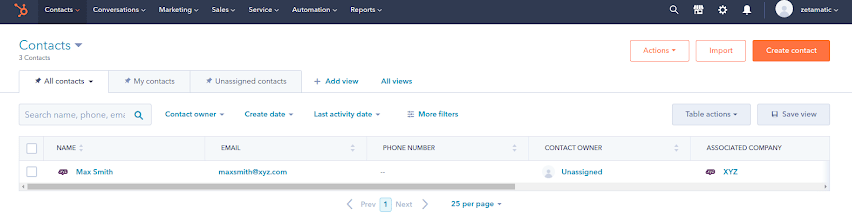
You can see more information about the lead by clicking on the name.
Conclusion
That’s it, I have shared all the steps to integrate Caldera Forms plugin. And HubSpot using the Caldera Forms HubSpot Integration Pro plugin. Now when any user fills and submits the form. The data will be automatically synced with HubSpot CRM directly from your WordPress website. You can also check out the free version of the Caldera Forms Hubspot Integration Pro plugin on your website. To see how this works.
You can use the form in the Sidebar, Footer, pages, and posts to get leads from your WordPress website. Using these leads you can do better marketing and sales processes. And do better with your businesses when you have all the processes automated from your WordPress website to HubSpot CRM.