


One of the most requested and useful features for an online store is Google Autofill Billing Field Mapping. Using the field mapping feature of the Checkout Address Autofill for WooCommerce Pro plugin, you can display data from multiple address fields in a single field of the checkout page.
For example, you can use this feature to display state and country information only in the state field. Simply follow the instructions to learn how to do it.
You can also watch this video to learn how to do field mapping on your checkout page.
- Address Separator: Choose any key that will appear between the address parts on the Checkout page. This key will separate those address fields, allowing you to better identify each of the addresses. The default address separator is comma (,), there are more options like #, Space, ., @, #, %, ^, &, *, :, ;’ , ?, _, -, \, / are available.

To assist you understand how it works, we’ve created a separate address separator video.
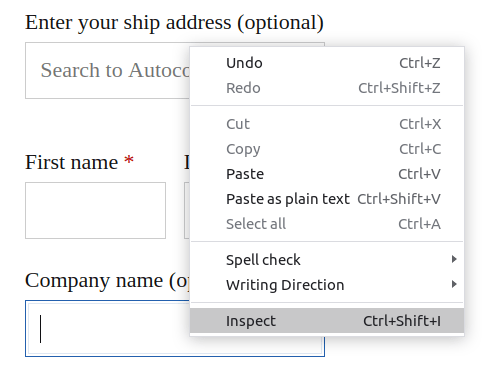
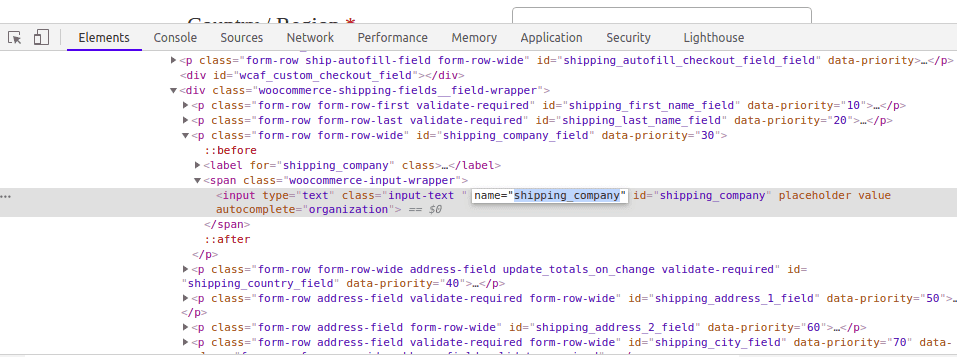
- To map a Google API response, the form field name property must be present. This property is very simple to obtain from the browser. Simply go to the checkout page, right-click on any field, and then select inspect, as shown below.
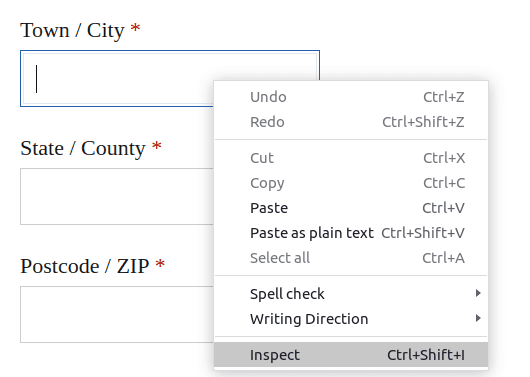
- From the name section, click and copy the text.

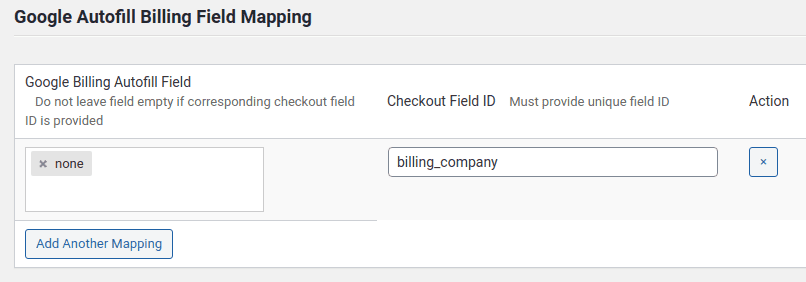
- In the mapping form, this field name property value should be provided as Checkout Field ID. Select the Google Autofill Field variables to be mapped for the corresponding checkout form field from the drop-down list.

- More field mapping can be added by clicking the Add Another Mapping button on the bottom left.
- Finally, click the Save Changes button to save and apply the changes.
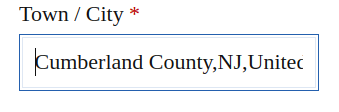
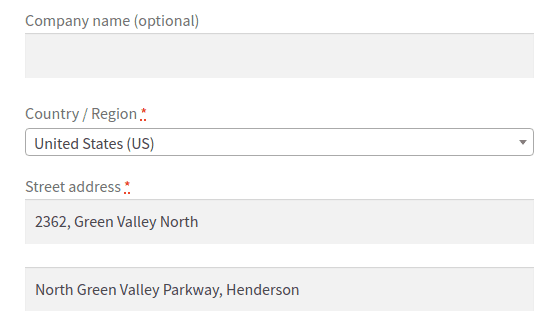
- For example, if the district, state, and country long are all mapped, the final autocomplete address field looks like this:
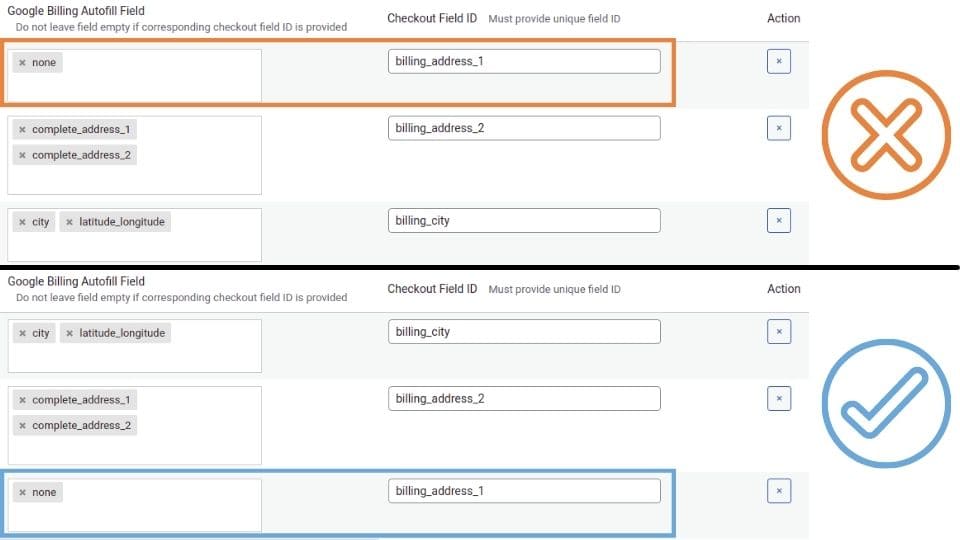
The ‘none’ Property
In the Google Autofill Billing Field Mapping, there is a special setting that allows you to leave any address fields on the checkout page blank and prevent them from auto-filling.
- To accomplish this, obtain the field’s name value from the checkout page, as we did in the field mapping instructions above.
- Then return to the plugin’s settings and enter that name value in the Checkout Field Id field. Now, add the ‘none’ property to the Google Billing Autofill Field.
- This ensures that the corresponding field remains empty even after autocomplete. Even if additional fields are included in addition to the ‘none’ option, the field will always appear blank on the checkout page following autocomplete.
Please note that when you add the ‘none’ property in the Field Mapping section, you should do it in the last row with the Checkout Field Id that you want to leave blank on the checkout page.
If you add any other field mapping below after the entry with ‘none’ mapping, all the fields added below the ‘none’ will be blank on the checkout page as well.